
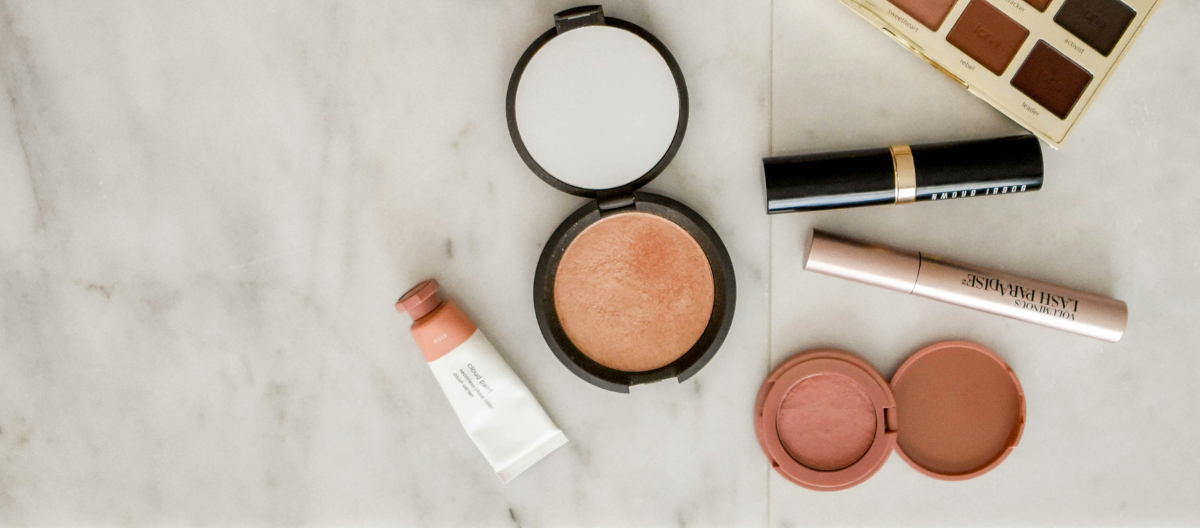
In the world of makeup, bronzer and contour are two essential products that can drastically enhance your look, but they’re often confused with each other. While both bronzer and contour are used to sculpt and define the face, they serve very different purposes. Bronzer adds warmth and a sun-kissed glow, while contour creates shadows and depth to enhance your natural bone structure. Mastering the application of both products can help you achieve a professional, polished look, whether you’re going for natural radiance or a dramatic, sculpted finish.
Bronzer
Bronzer is used to warm up your complexion and give your skin a healthy, sun-kissed glow. It mimics the effect of natural sunlight, making your skin look radiant and tanned.
Bronzer is ideal for days when you want a healthy, luminous look. It’s best applied to areas where the sun naturally hits your face, such as the forehead, cheeks, nose, and chin.
Types of Bronzers:
- Powder Bronzer: Great for oily or combination skin. It’s the easiest to apply and blend, making it a popular choice for most makeup users.
- Cream Bronzer: Works well on dry skin and provides a dewy finish. It’s also perfect for a natural, seamless look.
- Liquid Bronzer: Gives a soft, glowing finish and is great for layering with other liquid or cream products.
Contour
Contour is used to sculpt and define your face by creating shadows that emphasize your bone structure. It’s applied to areas where you want to create depth, like the hollows of your cheeks, jawline, and nose.
Contour is best for adding structure and enhancing your natural features. It’s commonly used for more defined, dramatic makeup looks, but it can also be applied subtly for everyday wear.
Types of Contour:
- Powder Contour: Ideal for oily skin and gives a matte, structured finish. It’s easy to blend and works well for beginners.
- Cream Contour: Best for dry skin or those who want a dewy, more natural finish. Cream products are great for blending seamlessly into the skin.
- Stick Contour: Convenient and portable, perfect for on-the-go touch-ups. Stick contours are easy to use and blend, making them a great option for those new to contouring.
Bronzer vs. Contour
Color: Bronzer is usually warm-toned (think shades of caramel, bronze, or gold), while contour is cool-toned (shades like taupe, ash, or neutral browns) to create natural shadows.
Purpose: Bronzer adds warmth and a sun-kissed glow, while contour adds depth and defines your bone structure.
Placement: Bronzer is applied to areas where the sun would naturally hit your face, while contour is applied to areas where you want to create shadows (like under the cheekbones, along the jawline, and the sides of the nose).
Bronzer: Step-by-Step Guide
Step 1: Choose the Right Shade
Pick a bronzer that is one to two shades darker than your natural skin tone. For fair skin, opt for light, golden shades. For medium skin, look for caramel or honey tones. For dark skin, try deep bronze shades with a hint of shimmer.
Step 2: Use the Right Brush
A fluffy, rounded brush or an angled bronzer brush works best for applying bronzer. These brushes allow for soft, even application without harsh lines.
Step 3: Apply to the High Points of Your Face
The goal of bronzer is to mimic a sun-kissed look, so apply it to the areas where the sun naturally hits:
Forehead: Sweep bronzer along the hairline to add warmth to your face.
Cheeks: Lightly dust bronzer over your cheekbones, moving toward your temples.
Nose: Apply a small amount down the bridge of your nose for a sun-kissed glow.
Chin: Lightly apply bronzer along your chin and jawline to warm up the lower part of your face.
Step 4: Blend, Blend, Blend
Blending is key to a natural bronzed look. Use circular motions to buff the bronzer into your skin, ensuring there are no harsh lines or streaks. Always start with a small amount and build up the product as needed.
For extra glow, you can apply a shimmery bronzer on top of your matte bronzer or use a highlighter on your cheekbones for added dimension.
Contour: Step-by-Step Guide
Step 1: Choose the Right Shade
Your contour should be two to three shades darker than your skin tone, with a cool or neutral undertone to mimic natural shadows. Avoid using bronzer as contour because it’s typically too warm-toned and shimmery for creating realistic depth.
Step 2: Use the Right Tool
For powder contour, use a small, angled contour brush or a fluffy, tapered brush for precise application. For cream contour, use a damp beauty sponge or a dense, small brush for blending.
Step 3: Map Out the Contour Areas
Hollows of the Cheeks: Suck in your cheeks to find the hollows, then apply the contour from the top of your ear down toward the corner of your mouth. Stop about halfway to keep it looking natural.
Jawline: Apply contour along your jawline to define it and make your face appear more sculpted.
Sides of the Nose: Lightly contour the sides of your nose to slim it down or define its shape.
Forehead: If you have a larger forehead, apply contour along the hairline to create the illusion of a smaller forehead.
Step 4: Blend for a Seamless Finish
Use small circular motions or a damp beauty sponge to blend the contour into your skin. Make sure to blend upward for the cheeks and outwards for the jawline, so the contour seamlessly fades into the skin.
If you over-apply your contour, use a clean brush or sponge with a bit of foundation to soften and blend the product.
When to Use Bronzer and Contour Together
For a balanced, sculpted look, you can use both bronzer and contour in your makeup routine:
Start with Contour: Define your features by applying contour to the hollows of your cheeks, jawline, and nose.
Add Bronzer for Warmth: After contouring, apply bronzer to the high points of your face (cheekbones, forehead, nose) to add warmth and glow.
The combination of bronzer and contour creates a beautifully balanced look, with bronzer warming up the face and contour adding definition.
